The Professional Home Studio Acoustics Course
Get Professional Grade Acoustics in Any Room.
The unfair advantage
You can use cheap recording gear and still get better recordings than studios that have a much more expensive setup if you beat them with better acoustics. The Home Studio Acoustics Blueprint will show you how to engineer the best possible sound quality for your space and budget.
A common mistake that many home studios make with their Acoustic Treatment Plan, is they research what the pro studio's do, and and mimic the same strategies. This does not work! Most pro studios have a larger space, and sound behaves fundamentally different in a large space than it does in a smaller space (due to the relationship of the wavelength compared to the size of the room). A smaller space can sound just as good as a large space, but it requires a different approach to treating the acoustics.
My Story
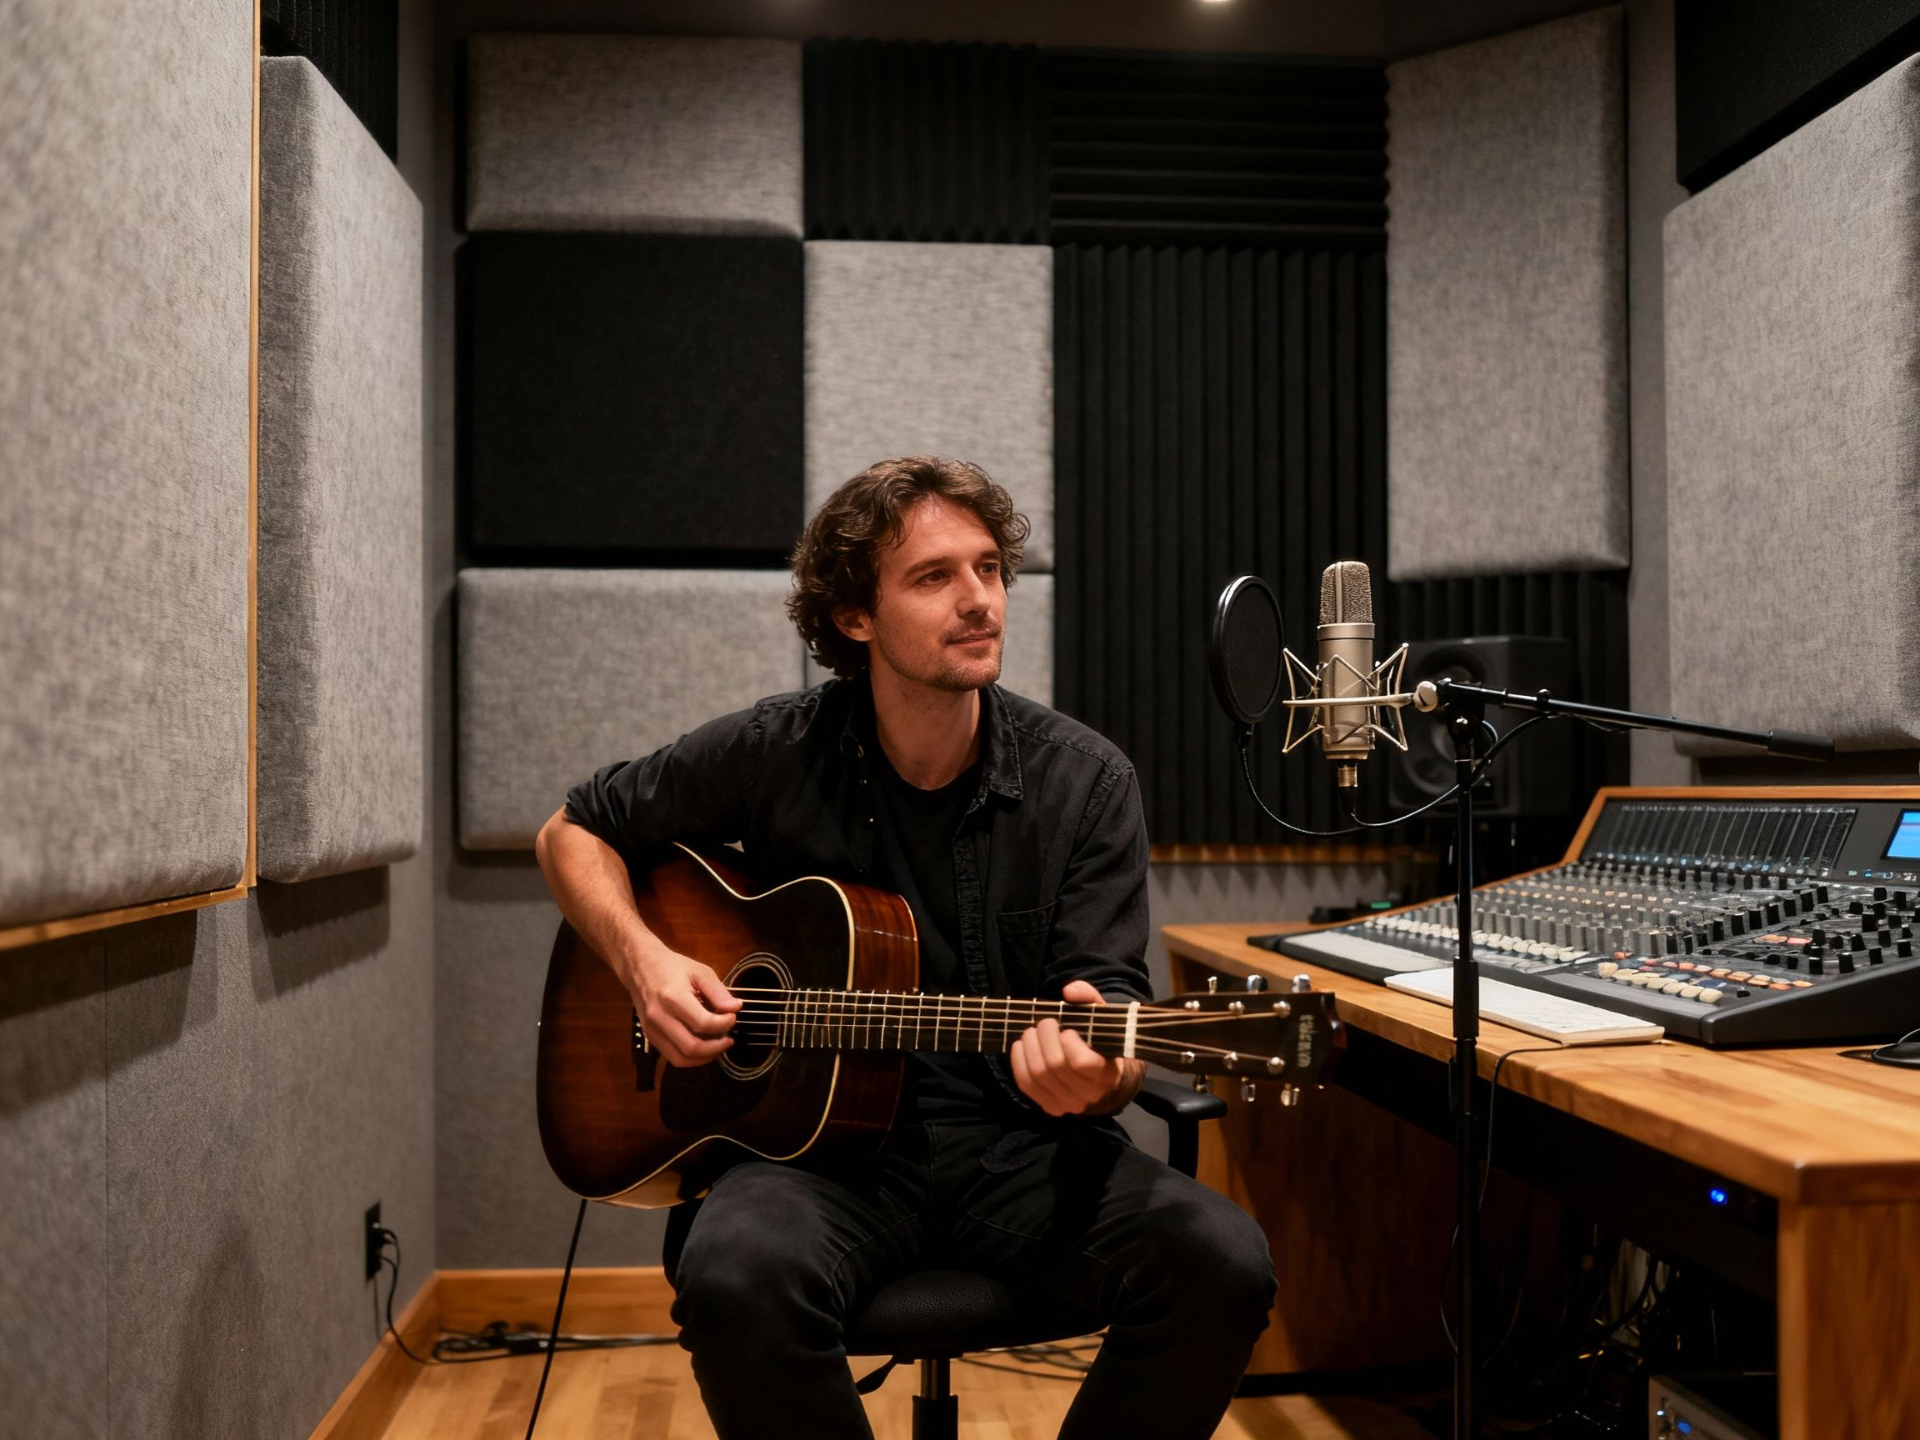
Hi, I'm Kris, I host the Get Pro Recordings facebook group, and the Get Pro Recordings Youtube Channel. I built my first home studio in 2003, and in 2011 I attempted to put together a professional studio in my basement. I failed miserably though.. because my recordings sucked. I had spent tens of thousands of dollars on the best recording equipment, and I couldn't figure out why my recordings weren't as good as other studios that didn't even have as good of gear as me. At the time, I didn't understand the importance of room acoustics, I thought if my room sounds good to my ears, well then it should sound good to a microphone. Well... I was wrong, and my recordings suffered because of it. Eventually, after a few years of frustration, I had to try something different, so I purchased some high quality sound absorption panels. I spend days researching the best ways to place them in my studio, and my recording quality instantly improved to a nearly professional level. But "nearly professional" wasn't good enough. I had exhausted the reading material available for free online, I had tried every piece of advice, and nothing was working.. so out of desperation, I purchased more acoustic treatment, of various different types, and spent an insane amount of time trying out different setups..... until I nailed it. The answer was not what people online were recommending. Those recommendations only got me to "almost professional" sound quality.
I'm not an acoustician, I'm an Audio Engineer, but after years of studying acoustics, and experimenting, I've developed an advanced knowledge on the behaviour of sound. Most importantly though.... my years of trial and error, and thousands of dollars spent on various treatment strategies has led me to discovering the Acoustical Secrets to making any room sound as good as a large professional studio, and I reveal everything in the Home Studio Acoustics Blueprint.
The Camera Analogy
The Zacuto camera shootout is a major competition between camera manufacturers to determine the very best camera for filming movies. Some of the most expensive camera's in the world are entered into this competition. The winner of the competition was once a Panasonic GH2, which is a consumer level camera priced below $1000. So why was it able to beat cameras that cost over $50,000? The answer is... Because of lighting. The Panasonic film team was more skilled at setting up lighting than the other teams, and therefore they were able to produce better looking videos.
In this analogy, room acoustics is like the lighting. Cheap recording gear will produce better sounding recordings than even the most expensive gear if the Room Acoustics are better. Every room has it's own unique tone, sometimes it's good, sometimes it's bad, but just like lighting, making it good doesn't happen by accident, it's an art that requires skill and planning.
When you are recording, your acoustics will either make, or break, the quality of your finished songs (or podcasts). When people listen to your recordings, you want to be proud of what you've created, and when your recordings sound just as good as the commercial productions we hear on the radio, people will know that you're a real professional. When you rise above the other studios, clients will notice, and they'll want you to record their project, because they heard what you can do, and that's how they want their productions to sound. The Home Studio Acoustics Blueprint teaches the secrets to acoustics that very few studios know. Here are some examples of what you'll learn in this Course that most home studios get wrong:
2 - The right balance of Absorption vs Diffusion for your specific room.
3 - Why some frequencies reflections are good, but other frequencies reflections are bad, and how to control them so you eliminate the bad ones, and promote the good ones.
4- How to optimize your treatment for the specific type of recording you do, such as a voiceover studio, a music studio or a mixing and mastering space. These different types of spaces have different acoustical needs to attain perfect audio.
5 - How to treat a control room differently than a live room
6 - How diffusion panels in the wrong application will actually make your recordings sound worse
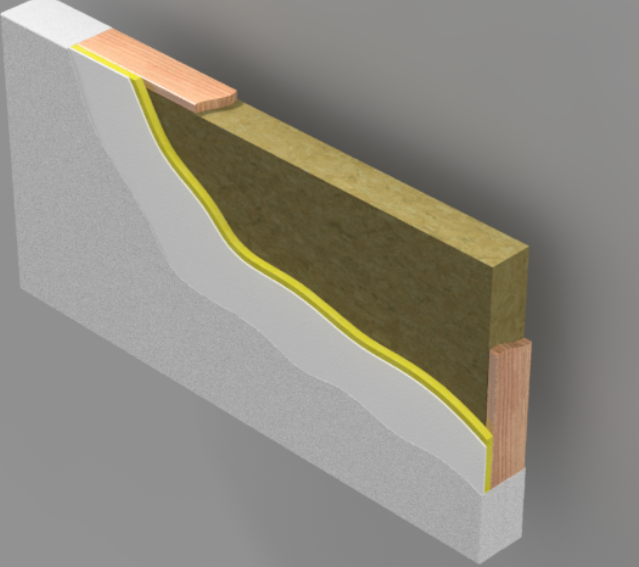
7 - How putting absorption panels on the walls usually doesn't do anything to the lower frequencies. This is why recordings done in those spaces are often lacking richness in that frequency range.
8 - How to not only reduce low frequency build up, but completely eliminate it much more effectively than installing "bass traps" in your corners.
9 - A comprehensive understanding of the strengths & weaknesses of the best absorption materials available, and why you would choose one over another in certain applications.
10 - The difference between making a room "sound good" (to our ears for listening), and "sound good" (to a microphone for recording).
11 - How to use the shape of your room to your advantage
12 - How to maximize your acoustics with minimum budget by making diy acoustic panels with materials available at most hardware stores.
13 - The awesome power of "non-invasive treatment" that can easily be removed and transported.
14 - How to build your own acoustic panels (as good as or even better than) those expensive commercial panels.
15 - How to build a small recording booth that actually sounds fantastic. HINT - Most sound booth's sound terrible.
16 - Why a small room requires a different "treatment strategy" than a larger room.
17 - How to find the "Shroeder Frequency" of your room - And why it's important!
18 - Why putting up panels on the walls and bass traps in the corners is not very effective at absorbing sound waves below your Shroeder Frequency.
19 - How to actually absorb sound waves below your Shroeder Frequency, and why it's a killer good idea!
20 - The relationship between the size of an acoustic panel, and the frequencies it can capture -- This one’ll pay massive dividends in your Sound Quality!
and last but not least....
1 - How to place absorption panels to promote "The Good Type of Diffusion" from the sound that reflects in between the panels. This is how you gain control and sculpt the reflections to make them sound pleasant!
Click here for the Professional Home Studio Acoustics CourseYeah... but I can learn all this stuff for free on YouTube
Yeah... but my room already has good acoustics
I can't afford to treat my room
You're exagerating.. A home studio can't get the same level of acoustics as the big studios
How do I know if I need to improve my acoustics?
Instant Pro Level Recordings
As soon as you improve your acoustics, it has a ripple effect that instantly improves your sound along every step of the process.
Your raw recordings will be clearer so they'll be easier to mix. The muddiness will be removed, which will bring out the natural warmth of vocals. You'll hear subtle details like never before, such as the nuances of different microphones and preamp, which will lead to more accurate mix decisions,

Improve your Mixes and Masters
Optimal Room Acoustics allows you to hear the authentic sound from your speakers more accurately. The better you can hear the fine details, the better you can adjust them. This leads to a higher level of precision in all of your mixing adjustments, and facilitates perfect mixes every time.
Save Money
Don't waste your money on inefficient acoustic treatments. The Home Studio Acoustic Blueprint compares the best acoustic materials so you easily build your own panels that work as good, or better than, the expensive commercial products, but for a fraction of the cost.
BONUS: You'll also learn the most effective ways to implement them so you maximize your sound quality -- at virtually any budget!--

Make high performing acoustic panels
When making your own acoustic treatment panels, there's several different materials that can work, but there isn't a single material that works the best in all situations.
The Home Studio Acoustic Blueprint shows you how and why.
The panel design you choose will depend on your room, your goals, your budget, and how you set your treatment up. I spent over a month testing the best absorption materials, with different setup configurations, and in different rooms. This course gives you my research findings *A huge benefit!*
Get the perfect balance between absorption and reflections
The size of the room, as well as other factors, determines which frequencies should be absorbed, and which should be reflected, as well as how much. Learn this key element and you’re well on your way to Pro levels of sound quality!
HINT: Most home studios get this Absorption/Reflection balance WRONG, and recording quality suffers.
You're about to become A Much Valued Acoustics Expert!
The Home Studio Acoustics Blueprint teaches Room Acoustics to an advanced level, and it spills the secrets that many Companies that sell acoustic products do not want you to know.
You'll be able to look at any room, and know right away what the acoustical problems are. Plus - You'll know how to alleviate them.
You'll have a well rounded understanding of sound physics, how sound behaves differently in a room than in a free field, industry standard materials for sound absorption, as well as unique knowledge of less well known materials that are also very effective. You'll have a knowledge set to feel confident charging money for professional acoustic consultation services helping other home studios achieve professional sound!
"I've never seen a home studio with excellent acoustics that couldn't produce professional sounding recordings"
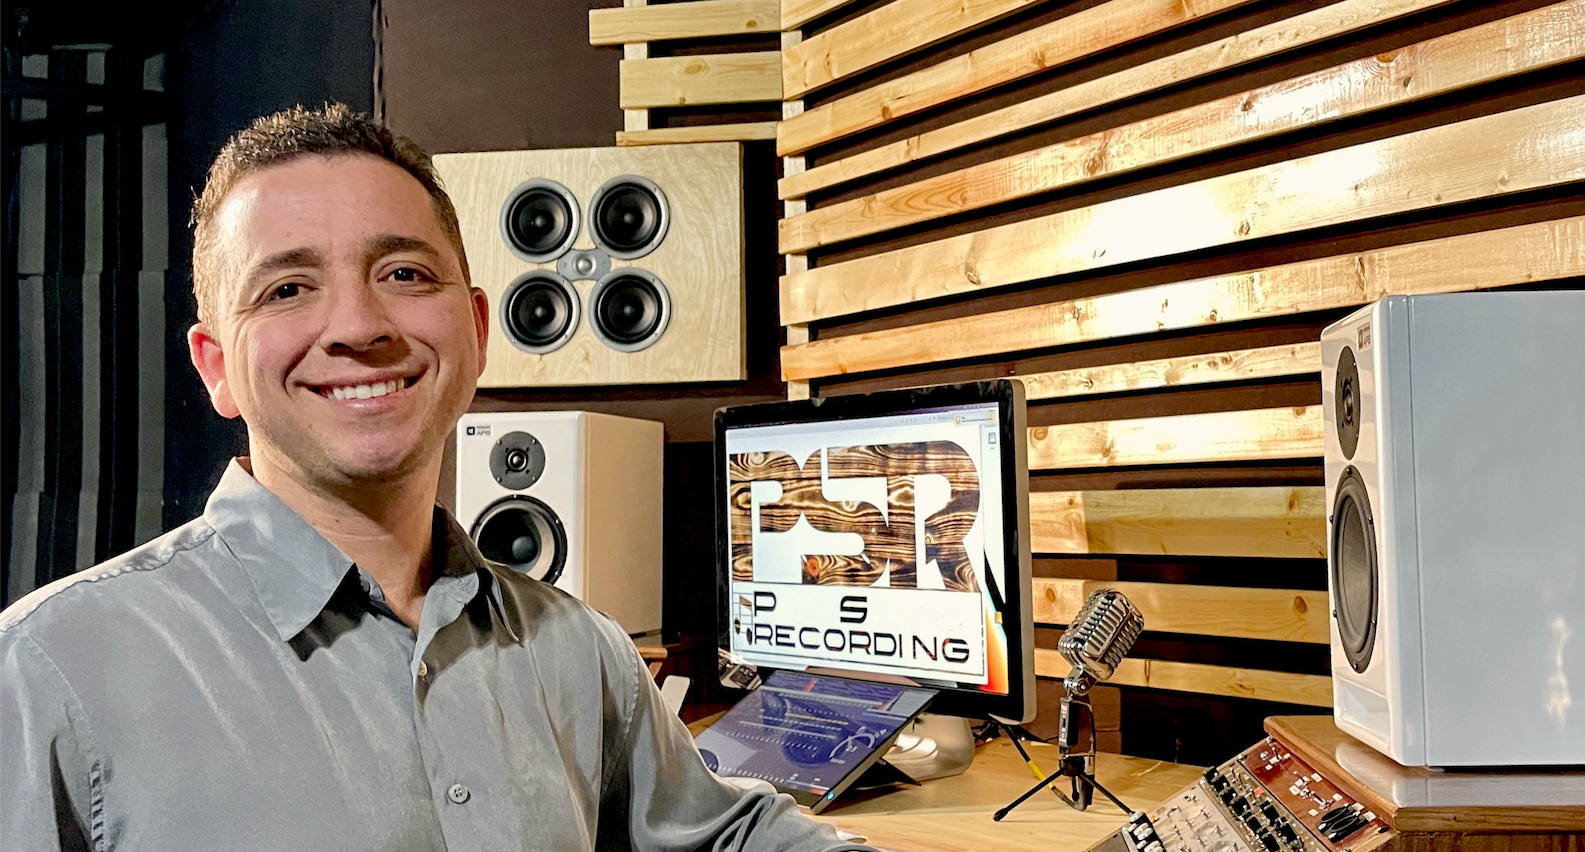
Your Instructor
- Kris
Limited Time Free Bonus
Get the Advanced Monitoring Course Free
Here's an excerpt from the course creator -
"When I look at a picture of someone's studio online, I try to estimate how good of recordings are being produced in that space. To determine this, I don't pay much attention to the microphones, or racks full of gear.. I look at 2 things... the room acoustics and the monitoring."
A lot of people don't realize that the second most important aspect is your monitoring.
Enroll in The Home Studio Acoustics Blueprint now, and you'll also receive -- At no extra cost-- The Advanced Monitoring Secrets course! A $49 value!
Automatically delivered with the purchase of your Home Studio Acoustics Blueprint.
Stop Wasting Money!
Many studio's invest in expensive gear because they want their finished recordings to sound highly professional. But often this high level gear doesn't make a substantial improvement because their room acoustics aren't at the same level of quality. If your room acoustic's aren't amazing, you'll never capture the full potential that your microphones are capable of, and you'll never hear the full level of detail from your monitor speakers.
Caution:
Many studios invest in expensive gear, because they want their finished recordings to sound highly professional.
But often this high-level gear doesn't make a substantial improvement because their Room Acoustics are their limiting factor.
Your Situation:
If your Room Acoustics aren't amazing, your microphones will not be able to capture the full level of detail they're capable of. PLUS - The true fidelity of your monitor speakers will be smoothed over before the sound can reach your ears, masking the subtle details.
Click here for the Professional Home Studio Acoustics Course


Over 100 tests of different absorption materials, in different configurations, and in different rooms.


You'll learn
- Treatment strategies that work better than the conventional approach of putting bass traps in corners, and absorption panels at first reflection points and spread out.
- The difference between a room that sounds good to your ears, and a room that sounds good to a microphone
- The unique treatment requirements for a recording space and a control room.
- The different acoustical requirements for recording music vs dialogue
- Which frequencies to absorb, and which frequencies to reflect - depending on several factors.
- The physics of how sound
- How sound behaves completely differently in a small room than a large room.
- How to make a space sound much larger than it really is.
- How to get the optimal balance between absorption and reflections
- How different acoustic materials work better than others in specific placement configurations.
- The best ways of absorbing low frequencies (it's not bass traps in the corners)
- The best acoustic material for bass traps
- the best acoustic material for panels on walls
Course syllabus
Intro
- Module 1 - My philosophy.
- Module 2 - Fundamentals
- Module 3- How Sound Behaves
- Module 4- Live vs Dead sound
- Module 5- Sound Absorption materials
- Module 6- Testing and Analysis.
- Module 7- Implementation Strategies
- Module 8- Frequently Asked Questions
- Bonus Module 9 - Implementation Examples
Module 1- My Philosophy
1.1- About me
1.2- Sometimes, a deader sound is a better sound
1.3- Microphones don’t have brains
1.4- Don’t trust your ears
1.5- A Uniform, neutral environment with a wide sweet spot
1.6- Room measurements and calculations
1.7- Summary
Module 2, Fundamentals
2.1- Fundamental and harmonic frequencies to create tone.
2.2- Definitions, parts of a wave.
2.3- Wavelength and speed of sound.
2.4- Phase and comb filtering.
2.5- Standing waves, resonant frequency and modes
2.6- Summary of what causes poor room acoustics
2.7- Intermodulation distortion (creates dissonance)
2.8- Bigger is better.9- Flutter Echo
2.10- 3.5 ways of eliminating reflections
2.11- Room measurement software
2.12- The Waterfall graph
2.13- Absorption coefficients
2.14- Parallel walls vs splayed walls
2.15- Helmholz resonator
2.16- Which frequencies should I absorb, and how much
2.17- Why low frequencies become muddy
2.18- Sound treatment vs sound proofing
2.19- Room correction software
2.20- Where should your listening position be
2.21- Where should your recording position be
2.22- Reflection filters
Module 3- How sound behaves
3.1- How sound exists in a room
3.2- Shroeder frequency (crossover frequency)
3.3- Early vs late reflections
3.4- Early vs late reflections formula
3.5- Diffusion
3.6- Reflect, absorb, or go through
Module 4- Live vs Dead sound
4.1- Control room vs Live room
4.2- Comparisons
4.3- Optimal treatment for a jam space
4.4- Optimal treatment for recording dialogue
Module 5- Sound Absorption Materials
5.1- Low, Medium and High density
5.2- Material Thickness
5.3- Rockwool
5.4- Owens Corning 703
5.5- Owens Corning 705
5.6- Comparison Chart of Low Frequency Absorption
5.7- Other Sound Absorption Materials
5.8- Fabric covering
5.9- Other sources of rigid fibreglass
5.10- Pink Fluffy Insulation
5.11- The GPR Panels
Module 6- Testing and Analysis
6.1- Analyzing the REW graphs
6.2- OC 703 trends, test group A
6.3- OC 705 trends, Test group B
6.4- Rockwool trends, Test group C
6.5- RFA tiles, Test group D
6.6- GPR panel trends, Test group H
6.7- Corners and first reflection points, Test groups 1, 2, and 3
6.8- Intermittent spacing, Test groups 4, 5, 6
6.9- Up close first reflection points, Test groups 7,8
6.10- Room within a room, Test group 9
6.11- Full wall, Test groups 10, 11, 12
6.12- Reflectivity tests
Module 7- Implementation Strategies
7.1- Analysis of my studio treatment
7.2- First reflection points.
7.3- Corners
7.4- Variations of a Full Wall
7.5- Remove a wall and fill it with Rockwool
7.6- Build Gobo’s
7.7- Angling Drywall for Diffusion
7.8- Hanging ceiling tiles from the ceiling.
7.9- Build an Isolation Booth
7.10- Full Room Strategy: Corners and first reflection points.
7.11- Full Room Strategy: Room within a room.
7.12- Up close first reflection points with Gobo’s
Module 8- Common Questions
8.1- Should I worry about sound reflecting off a window?
8.2- What areas in the room should I avoid?
8.3- Where should I place my listening position?
8.4- How can I make a small room sound big?
8.5- Where should I put my desk and monitors?
8.6- What’s the difference between flush mounted speakers?
8.7- Should I record in a closet?
8.8- Are commercial recording booths good?
8.9- I’m renting, How can I setup treatment that’s not permanent?
8.10- Do room acoustics matter if I mix only with headphones?
8.11- How can I fix a recording that was done in a poor acoustical space?
8.12- What’s the best place for a subwoofer?
8.13- What about noise made from equipment?
8.14- Do I need treatment if my room dimensions are ideal?
8.15- Can I reduce the effects of room acoustics by turning my volume down?
BONUS: Module 9- Implementation Examples
9.1- Bedroom $500
9.2- Bedroom $1,000 budget
9.3- Bedroom $1,500 budget
9.4- Bedroom $3,000 budget
9.5- West Studio
9.6- Andy’s studio
9.7- Small basement room
9.8- Long and narrow studio, low budget
9.9- Long and narrow studio, High budget
9.10- Really large space
9.11- Jim’s living room
9.12- Jose’s studio
9.13- Chris’s guest house studio.
9.14- Guitar Cab isolation box
Our Promise
If you have:
1- A space at least the size of a bedroom,
2- A budget of least $500 for acoustic treatment, and
3- Access to a hardware store, and basic diy capabilities (ie..build a basic wooden frame that can hold acoustic treatment materials).
This course will teach you to get your acoustics up to a level that enables you to get professional quality recordings, mixes, and masters, and it goes far beyond what's available from any other resource.
We provide a 7 day money back guarantee if you're not 100% satisfied with us upholding this promise.
